14 Things to Know about Photoshop CC 2019

Photo © Slavenko Vukasovic – Dreamstime.comAdobe Photoshop CC 2019 has been out for several months now, but many of us are busy with our daily activities and may not have had a chance to explore all the great new features available. If you fall into that camp, or maybe you just need a quick refresher, here are 14 neat new features you may want to explore in Photoshop CC 2019.

New Content-Aware Fill

One of the biggest areas of improvement is with the content aware fill function. The new Edit – Content Aware Fill dialogue box allows for greater control over the process. A Live preview area will show the results being generated as you modify your selections. The sampling zone shows the area included in building the fill. Painting with the sampling brush removes areas from consideration while the ALT or OPT key will allow you to paint areas back in. Tick boxes control fill settings for color adaption, rotation adaption, scale and mirror effect; and the output settings control if the effects are applied to the current layer, new layer or duplicate layer. The lasso tool in the interface allows for further refinement of the fill area.

Photo © Chansom Pantip – Dreamstime.com

Symmetry Mode

Choosing the butterfly icon in the options bar when working with the Paint Brush, Mixer Brush, Pencil or Eraser tools allows you to control a symmetry in the created pattern. Symmetrical settings include the vertical axis, horizontal axis, dual axis, diagonal axis, wavy, circle, spiral, parallel lines, radial and mandala to create intricate symmetrical patterns.

Multiple Undo

The new undo tool Control+Z (win) or Command+Z (mac) now works to undo multiple undo steps. A real time saver when trying to fix those nasty situations we can find ourselves in.

Auto commit actions

Crop, transform, place and text tools no longer need to be explicitly committed. Moving to a new tool, selecting a new layer, or clicking outside the canvas will commit the changes automatically.

Framing Tool

The Frame Tool easily creates a rectangular or elliptical frame which can be filled with another image or illustration. Dragging content into the frame will convert it to a Smart Object such that it can scale non-destructively. Any existing shape or text can be converted to a frame by selecting Convert to Frame in the layer operations menu to create a frame for use in the same manner.

Improved in-app learning

Use the in-app tutorial from the Window – Learn panel to understand principals by following a step-by-step process. Then select the “Try with your own images” option at the end of the tutorial to have the same step-by-step process illustrated to walk you through making the adjustments in real time.

Transform proportionally

Layer transformations are now proportional by default with the exception of shapes and paths. Switch to non-proportional transformations by holding the Shift key.

Illustration © Aleksey Vanin – Dreamstime.com

Double click to edit text

No longer do you need to toggle to the Text Tool to edit existing text. Double clicking on the type layer with the Move tool allows for quick edits.

Live blend mode preview

Not sure what affect the Layer Blend Modes you select are going to have on the layers? Now with Live Preview, the results will show you scroll the options in the Layers panel or Layer Style dialog.

Math in number fields

Not good at math? Enter simple math operations in any numeric field and let the application do the calculations for you.

Color wheel

In the Color panel, select the Color Wheel from the menu to display the color spectrum and easily choose color values based on color theory and principal.

Lock Home Screen

Use the new Window-Workspace-Lock Workspace to prevent accidental moving of workspace panels.

Distributed spacing

Objects can now be selected and distributive spaced in addition to aligned and distributed.

Photo © Kaspars Grinvalds – Dreamstime.com

Increase UI size

Use the Edit-Preferences-Interface to tick the Scale UI to font box and choose the font size Tiny-Small-Medium-Large to adjust the scale of the UI if you find those icons and dialog boxes a touch too small.

Even if you don’t have time to explore all the new features available, now you know what features are available to you the next time you might need them.

Stock photos provided by Dreamstime.com

Author Bio
Karen Foley is a freelance photographer and writer who loves sharing her art with others. See more of her work at karenfoleyphotography.com.

The Smarter Way to Isolate Stock Photos in Photoshop

Images & Article by Pratik Panda

Photoshop is a very versatile software when it comes to processing of digital images. If you have been into stock photography for quite some time, you definitely know the importance of digital post processing and how much it can affect your status in the stock photography business. This is not just true for portraits, HDR images and low light images, but also for studio images that require “isolation”. Isolation refers to the neat removal of the background from an image so that the frame contains just the subject. The background is usually transparent/white/black depending on what suits the application best. Isolating images makes it possible to use the images as “clip art” and boosts sales in most categories.

There are a variety of methods for creating isolated objects. That includes the most primitive method: Erase the background away using the eraser tool! But is it smart? Not really. How long would it take to isolate a millipede? Perhaps two days and a ton of will power.

As stock photography is a game of both quality and quantity, the simple methods start to become very inefficient for a large number of complex images.

This is where the smarter features of Photoshop come to the rescue. Using the edge refining algorithms, Photoshop can make the task of isolation much faster even on complex objects such as hair or partly blurred subjects. Also, this method removes the “stains” of the previous background color that was removed, thus creating an impression that the object was shot in a studio environment with a neutral background color even if it was not.

Here is how to do it the smarter way:

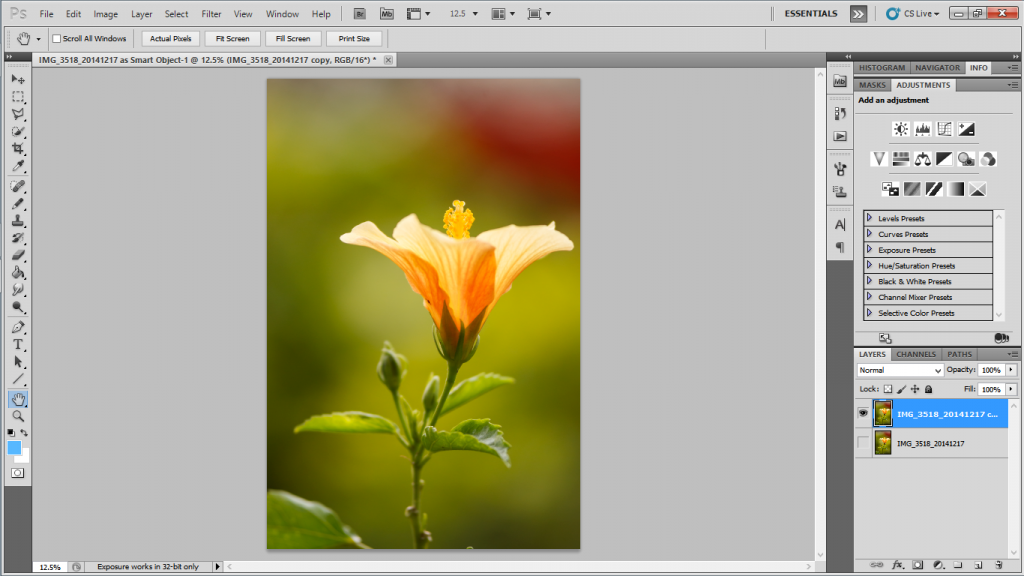
As an example, let us try to isolate a hibiscus flower on a green background. A part of it is blurred by low depth of field – which means erasing away the background will not work as the edges must be hard and smooth depending on where the object is sharp and where it is blurred respectively.

Isolating Image in Photoshop

A flower that needs to be isolated.

Notice that there are sharp as well as smooth edges in the subject. Also, the subject color is very similar to background color – nightmare for isolation by normal methods.

Isolating Image in Photoshop

Hard and smooth edges.

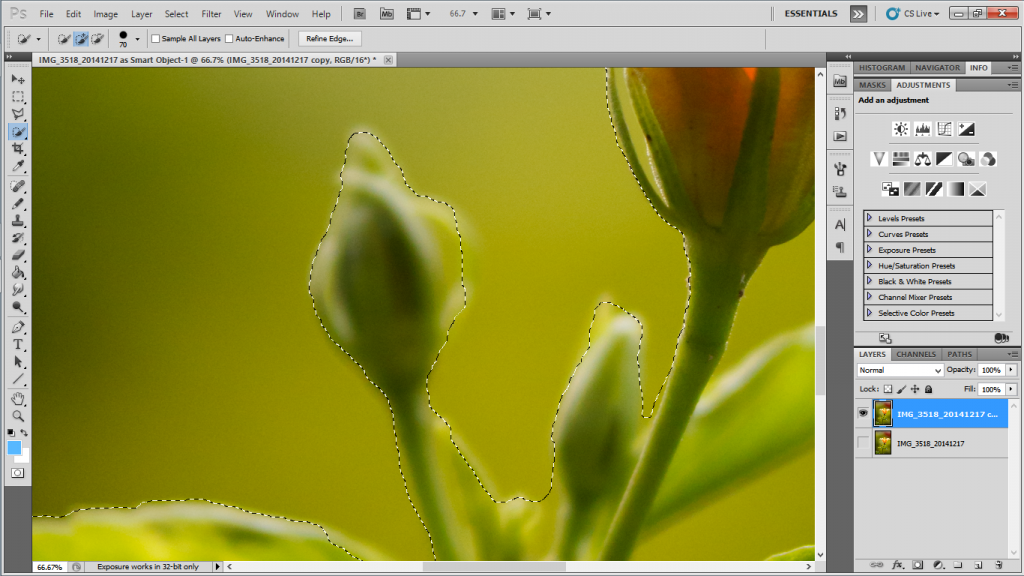
We will begin by using the “Quick Selection” tool to select the background that we have to remove.

Isolating Image in Photoshop

Quick selection tool.

The objective is to ‘select’ the subject as well as possible using the quick selection tool. The approach for this image is to select the background and then right click > Invert selection so that the subject is selected.

Isolating Image in Photoshop

The subject is selected. Blurred areas are roughly selected.

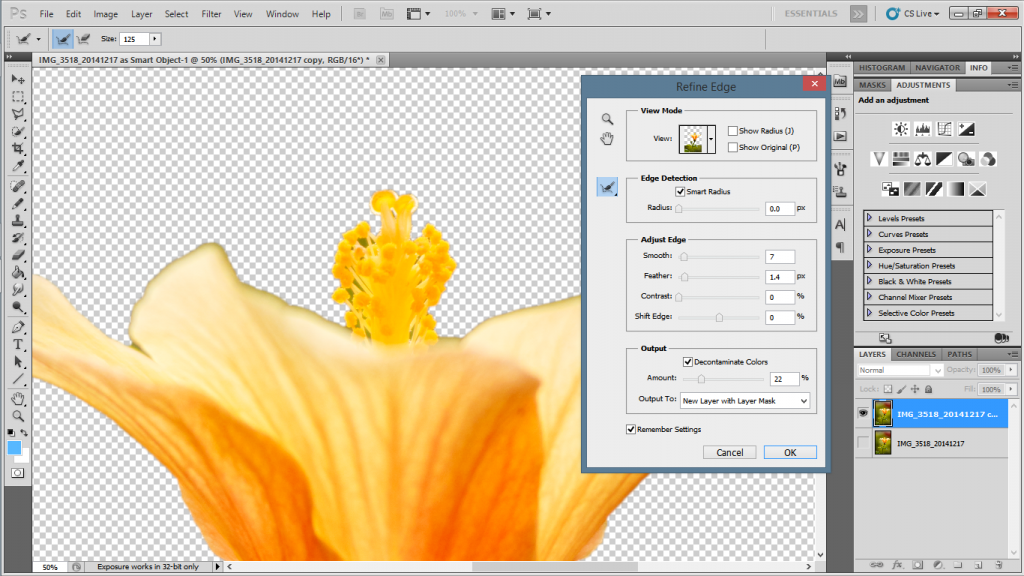
Now, go to the menu bar and go to Select > Refine Edge and then select a type of view in the Refine Edge window that pops up, preferable selected layer on background layer. You should see something like this:

Isolating Image in Photoshop

Refine edge tool.

You may see the background layers if you have any layers under the current layer.

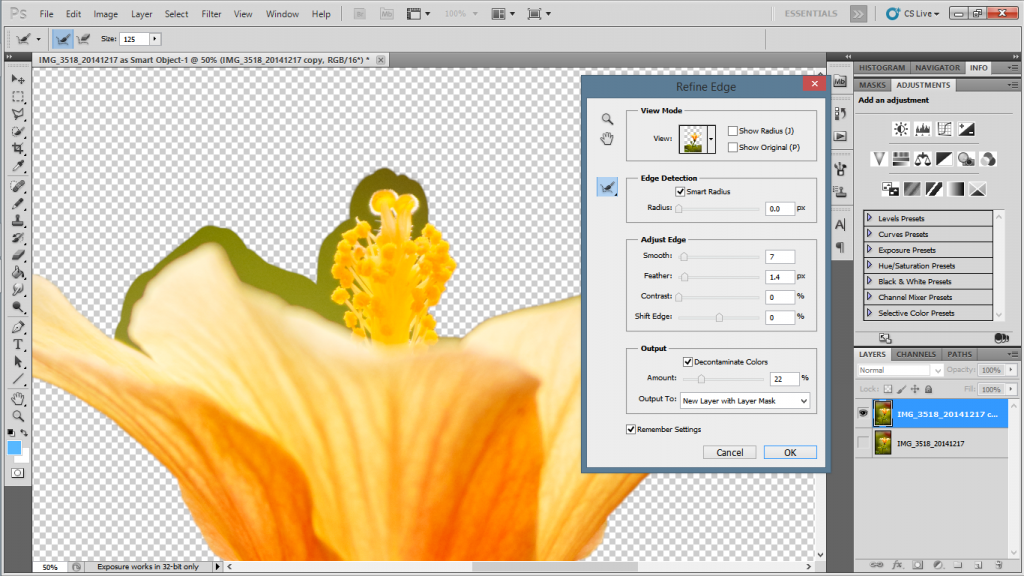
To remove the greenish ‘stains’ from the edges of the petal, you can select the decontaminate colors option and get rid of any remaining color left behind by the removed green background. Now to smooth out the edges, all you have to do is use the brush tool in the dialogue and paint on the edges to enhance them. The settings shown in the screenshot work well for most situations, however, feel free to experiment.

Isolating Image in Photoshop

Brush tool and painting on the edges to enhance them.

You can do the same with the blurred regions too. Though it may need some care and attention, it will give you good results in a few seconds and after a couple of strokes.

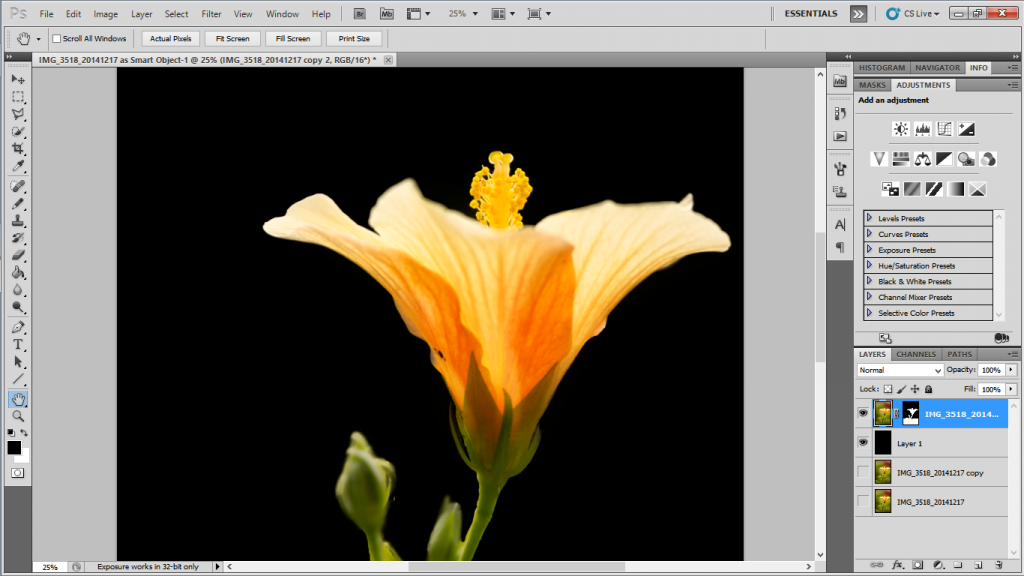
You can now hit OK when you are satisfied with the results. After you are done, you will get the object isolated. To put a different background, for example, a black background, you can simply create a new layer beneath the current layer and fill it with black or white, etc.

Isolating Image in Photoshop

The flower isolated on black.

Don’t forget to save your work!

Isolating objects is fun and a much better experience now, is it not?

10 Habits of a Successful Photographer

Written by Nancy Young

Woman on Bridge Image

Image: Stefano Tinti | Dreamstime.com

1. Be Ready to Learn

The road to your success as a photographer begins from your mindset. From there you can do a lot of different things to improve your skills and grow as a professional. Developing certain habits is one of the ways your dreams and aspirations can take physical form through your actions.

In this post you can find the list of 10 habits to help you reach your goals and make dreams a reality.

In the world of affordable DSLRs and smartphones with advanced photography features, photography is more often seen as a no-brainer. However, even the most expensive camera won’t entirely hide poor photographic skill. But if you know something about composition and lighting, you’ll be able to create a great photo even with a entry-level pocket camera.

The best photographers keep learning even after they reached success. The more you know, the more you don’t know. This ancient observation can totally apply to a modern photographer’s experience.

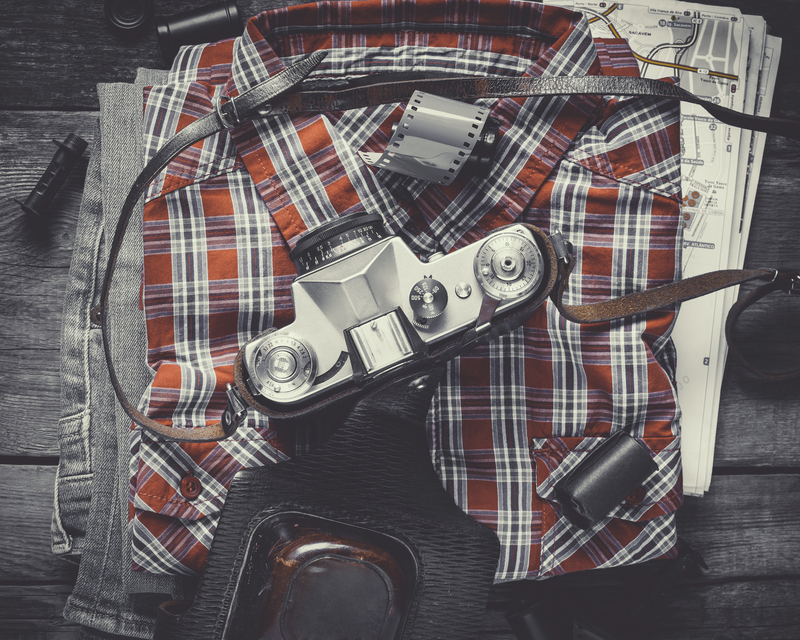
Plaid Shirt and Camera

Image: Natallia Khlapushyna | Dreamstime.com

Fortunately, there are a lot of different ways to learn photography and polish up your skills today. For instance, you can take online courses, attend a formal class, read books and ebooks, follow the tutorials on photo editing, or just keep practicing and learning from your own experience.

2. Know Your Equipment

Are you able to operate your camera blindfolded? It’s not that necessary skill to practice as a photographer, however, you do have to know your equipment and its possibilities to discover new boundaries. You have to know how to operate those ISO and shutter speed settings along with how each of your manipulations will impact the final image. Knowing how to do it fast will help you not to lose a great shot in any situation.

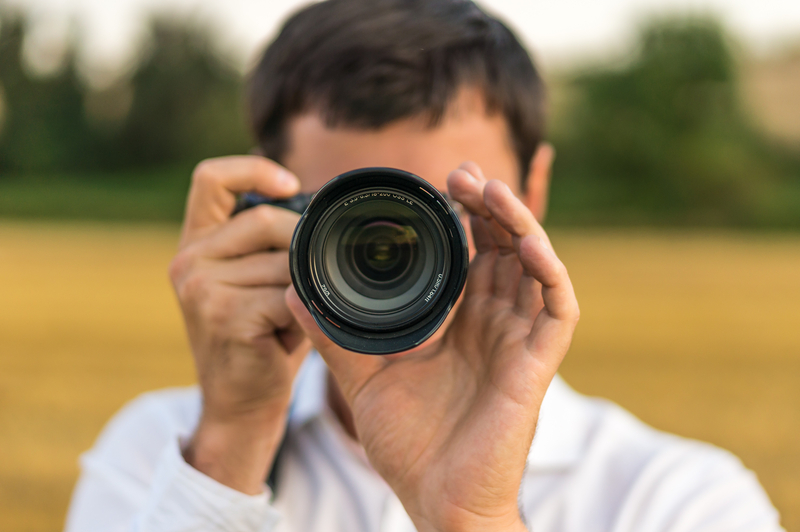
Man Aiming Camera

Image: Andrianocz | Dreamstime.com

Take your time to read your camera manual or online reviews, even if it is painful experience, as all professional photographers do that.

3. Be patient and dedicated

Patience, persistence and dedication are your best companions on the way to success in the photography. Walking this path is gonna be difficult and sometimes you’ll feel like turning around, but being a great photographer requires effort, right?

By practicing regularly and remembering what makes you so passionate about photography, you can eventually reach the level of mastery you’re striving for.

4. Use Productivity Tools

A true professional values their own time and time of their clients and partners equally. These days there are a lot of great productivity tools to help you streamline your routine work. Why not take advantage of the technology progress and save precious time for the creative process?

For instance, Defrozo is one of the latest tools enabling photographers to manage all the ins and outs of their marketing in one place, for free.

Such automation tools like IFTTT and Buffer can also come in handy for organizing your workflow without soul killing manual work.

5. Think of yourself as a business

Investing your effort into the business side of your photography career is critical to your success. A habit of looking at things from an entrepreneur’s perspective is a surefire way to establish a prosperous photography business.

Laptop on Desk with Coffee

Image: Kittiphan Teerawattanakul | Dreamstime.com

Having a beautiful, mobile-friendly website, a set of business cards, and social media accounts for networking and brand promotion is a must for any aspiring photographer these days. Do your market research and create a consistent, attractive business kit to cast your marketing lines into many ponds.

6. Learn to Adapt

Learning to stand against stress and adapt to the situation is an extremely useful habit to gain. When something goes out of your control or some unexpected things show up try not to get frustrated. Instead, take a deep breath, keep your zen and try to get the maximum results from the situation you have. Sometimes bad things can turn good in the end, just don’t let panic and fear of failure to ruin everything before you get there.

7. Look for inspiration

Savvy photographers know that if inspiration doesn’t come to you, you can come to inspiration! Train your creative eye by simply looking at things around you and trying to see a “story” this particular object can tell in a picture. A project 365 or even a regular Instagram posting can help you with this task.

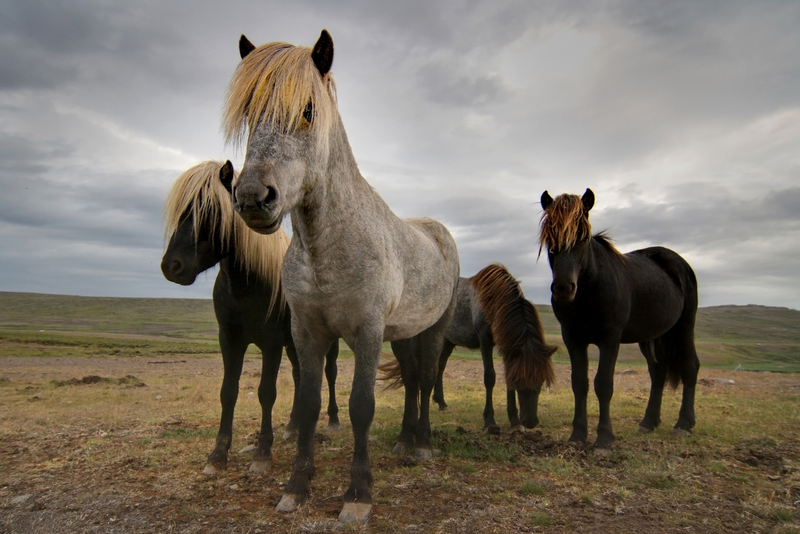
Icelandic Horses

Image: Santiago Rodríguez Fontoba | Dreamstime.com

Following the work of other photographers can be a great way to come with the ideas for your own work and stretch your boundaries. 500px and Behance are good places to discover amazing talents and notice some neat ideas you can develop and implement.

8. Know yourself

In any creative field, whenever it’s art, music, or photography, there are would be some days when you just don’t feel it. It’s necessary for your productivity to figure out when during the day you’re the most and least productive. When your stamina can’t keep up with your creative plans, dedicate your time to some routine work that doesn’t require as much of brain activity. When you have maximum productivity, for instance, in the morning, do some opposite things. This way you’ll be able to check off tasks from your to-do list faster and with better results.

9. Accept Any Feedback

One of the best way to improve your work is to seek for feedback and constructive criticism. You may get this feedback from your clients, friends, photographer you know, or online resources where you showcase your photography. It’s important to consider the feedback you get and make proper conclusions to improve your skills.

Desert Highway

Image: Paul Lemke | Dreamstime.com

Negative feedback should not disappoint you or make you upset, it needs to be your inspiration to become better photographer and finally make these people change their minds.

10. Be an eager collaborator

Never miss a chance to learn from other people and collaborate with like-minded creatives as it’s a truly inspirational and refreshing experience.

One of the key pillars of effective networking is being helpful and providing value to people. A blog post in which you share your takeaways from the latest sessions or a workshop giving your target audience an edge can help you build an authority and make people want to work with you. Another simple yet proven tactic to grow your network is using your lunch time to meet with other people rather than quickly swallow your food while processing photos in Lightroom.

About the author…

Nancy is a passionate freelance writer and blogger. She writes tons of inspirational articles on photography and web design, despite the fact that she is an economist by education. She enjoys reading, learning SEO and also losing her mind to French movies. You can check out her photography blog Photodoto and follow her on Twitter.

A Beginner’s Guide to Buying Microstock

Written by Kevin Thomas

An experienced designer will know how to manipulate images and find them for his current project, but what about people who are new to locating and editing images?

If you’ve been given a task to find and locate an image for a particular project, or you’re working on a task for yourself, it can be daunting just to find an image to begin with. Copying and pasting images for jokes to email to your friends is one thing, but the first thing you need to be aware of is copyright laws. You are looking for legal trouble if you think you can lift an image off the internet and use it for a formal publication or internet site. In fact, you can’t use it for most informal situations also!

Purchasing the rights to use an image is your best course of action. It is important to understand this. Yes, there are images which you can use for free. Most of the microstock sites will have a free section and there are also archival web sites that provide free use of images. There still will be legal limitations and terms of use for free images. It is up to you to research these restrictions.

When it comes to finding an image to use, you can start by searching the internet for STOCK IMAGES or MICROSTOCK. There are many internet sites that offer images for sale and weeding through them could become a job in itself.

After selecting a microstock site, the next step is to find the image you’re looking for. With tens of millions of images available for sale, the task of finding the right one could prove to be challenging. There will be a search feature where you enter specific keywords and that can be a science unto itself.

Photographers and illustrators who submit images to microstock sites are responsible for entering keywords. If they upload a picture of a cat but keyword the picture with the word FELINE, you will never find the image by searching on CAT. The reverse is also true, if you search on FELINE, you will not find CAT images.

dtSearch2
Searching for the perfect image on Dreamstime.com

There isn’t much you can do if images are poorly keyworded, but you can try different words or combinations of words to see what results you may get. There can also be options for how the images are sorted. Some microstock sites allow you to search by relevancy, upload date, best selling, and more. By trying various keywords and sort options, you will greatly increase your chances of finding the perfect image.

After selecting the image you need, probably the greatest concern is the size of the image. Many times an image needs to fit into a space with specific dimensions. Resizing and/or cropping the image may cause the image to be unusable. Most microstock sites will allow you to download a complimentary copy of the image so you can verify the picture will work within your project. The image will have watermarks to prevent the unauthorized use but it will allow you to verify that it will work before purchasing.

The problem is if you are inexperienced with manipulating images. If you don’t have software for editing images, how are you going to verify if a particular image is going to work for you? Fortunately, you do have some options.
If you have Microsoft Word, you can import the image into a Word document. You can then crop and resize the image as needed. This will be a process of trial and error but it’s an alternative from purchasing a software package that can edit images.

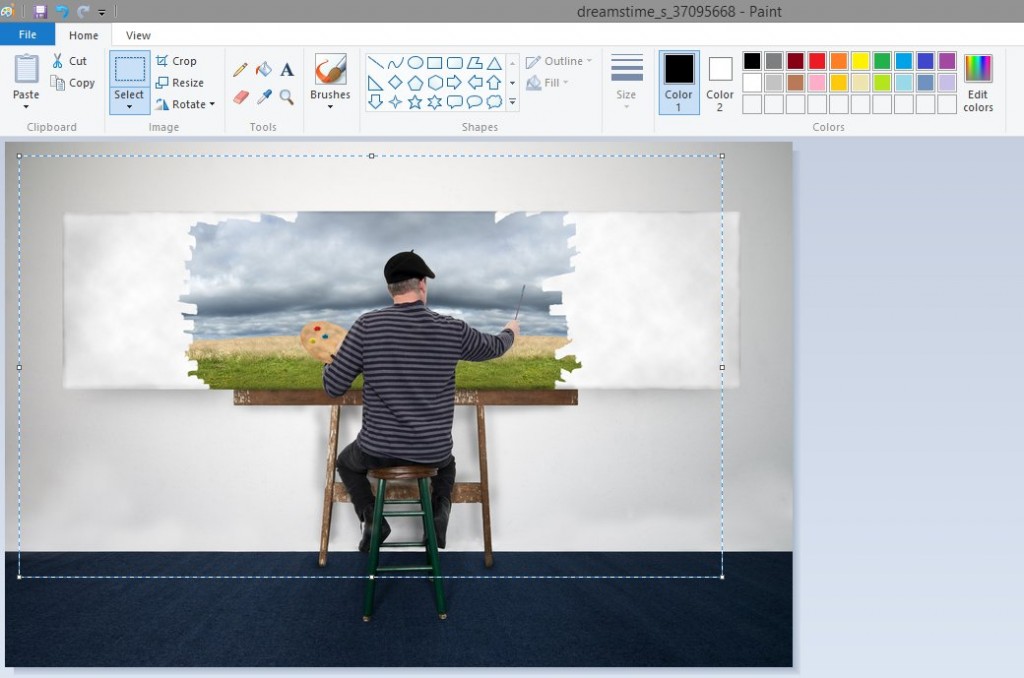
Computers that have a Microsoft operating system, most will come with an application called “Paint.” It’s a simple but free image editing software package. You can resize and crop images and it doesn’t require much skill to use the software. After manipulating the image as needed, you can then make your purchase with confidence.

msPaint
Cropping an image by Kevin Thomas with MS Paint

A couple of other free or low cost options for image editing are:

GIMP (Free)

Adobe Lightroom

Purchasing images is essentially a three step process. The first step is to find a microstock site on the internet that you’re comfortable with using. Second, you may need to employ various search strategies in order to find the perfect picture. Keywording is not always exact so you may want to try your searches with more than one approach in mind. Lastly, you will want to ensure the image will work if it needs to be resized or cropped. Chances are you you will have options for fundamental image editing without having to purchase additional software.

The Difference Between Commercial and Editorial Images in Microstock

Images & article by Kevin Thomas

dreamstime_s_48570600
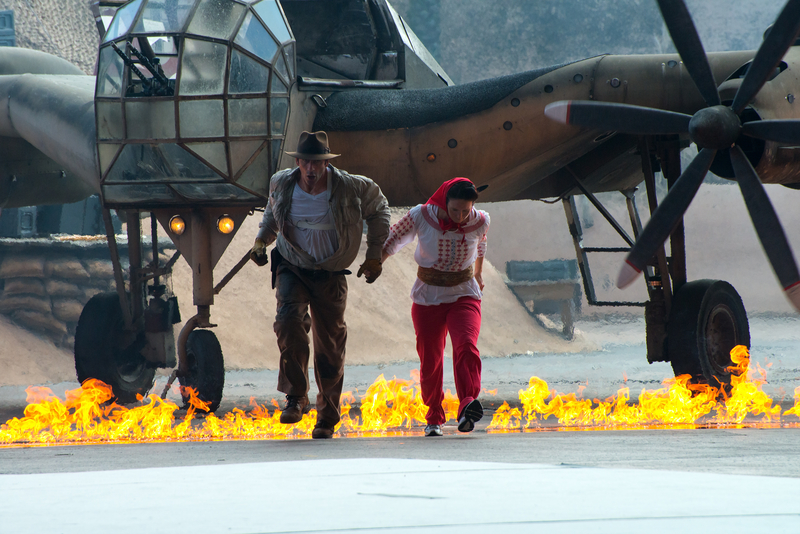
Editorial Photo: Disney World Indiana Jones

Many people entering the world of microstock photography have a difficult time understanding the different between images that can be used for commercial purposes versus editorial. The answer is actually so easy and obvious that it becomes difficult to explain. It’s almost like someone asking you how to breathe. You just “breathe,” right?

OK… Let’s say you photograph a man standing in the middle of a street. If you want to use that image for commercial endeavors, then you will need the man to sign a Model Release form. By signing the form, the man is giving his consent for the image to be used for commercial purposes. If he does not sign the form, then it can only be used for editorial.

Most photographers are aware of model release forms but they still do not understand how this particular image floats in the realm of commercial or editorial. Look at it this way: If the image is editorial, then you can only state what is factual about the image. “Here is a man standing in the middle of a street. The man is walking in a neighborhood with houses. The man is wearing blue jeans and has a mustache.”

dreamstime_s_40419059
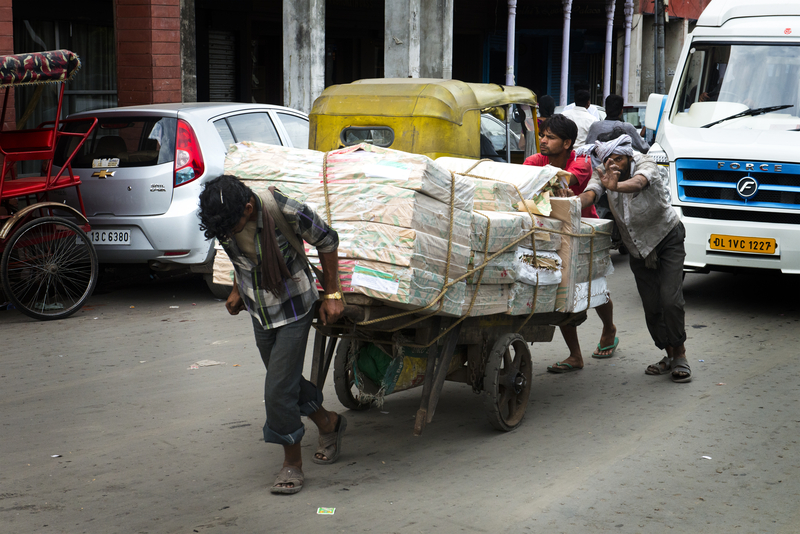
Editorial Photo: Workers, Laborers Haul Goods to Market in India

That is essentially what makes an editorial image, you are providing an image of a factual situation. People at a sporting event, a city scene, a famous person at an event, you see these types of images all the time. Editorial images provide a visual context for the viewer in relation to a particular event, setting, thought, situation, etc.

Let’s clarify this a bit more and go back to our picture of the man in the street. Is the man scary looking? Is he ugly? If you’re an insurance company and you want an image for a brochure promoting homeowner insurance, you might want a picture of a scary, ugly man prowling the neighborhood. If you use this image and caption it “Is Your Home Safe,” you are now implying the man is dangerous. The man could be a criminal or some kind of nut.

Since the man did not sign a model release form, he has not consented for having his face being used to sell insurance. The brochure implies you need to protect yourself from crooks such as this man. If you are representing the man to be a bad person, you have crossed the line from editorial to commercial. If you want to capture a scene of a scary, dangerous crook, then you will need to hire a model or buy some beers for your brother-in-law, anyone who is willing to create this concept for you and sign a model release. The model has to consent to representing whatever your idea is to portray.

dreamstime_s_26938771
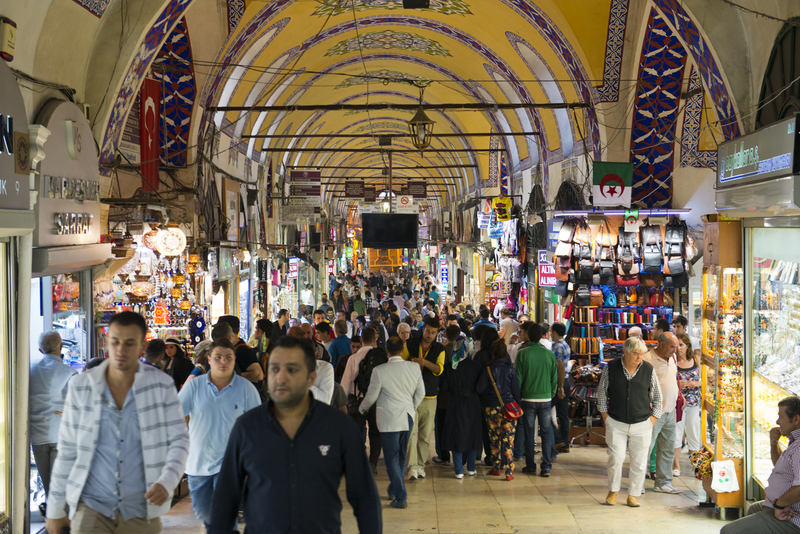
Grand Bazaar, Istanbul, Turkey, Travel Destination

In this case we are suggesting the model to be a bad person. However, the character of the man is not the only thing to consider when understanding the differences between commercial and editorial images. If we print the picture of the man in the street and say “This man enjoys drinking Coca Cola,” again we are going beyond the basic facts on the image. If the man is actually drinking a Coke, we still can’t use the image for promoting a soft drink if he has not signed a model release form.

If you want to use an image for commercial purposes, then you have to think in terms of what the character of the subject may be and what the person may be promoting. We all know the people in TV commercials are paid actors who may have never used a particular product. Yet these actors are promoting and endorsing the product anyway. In these cases the company is using actors to represent customers who use and enjoy their product. You might see a TV commercial of a dishonest auto mechanic with the suggestion you go to a particular garage where you will get a fair deal. Is the auto mechanic in the commercial really shady and dishonest? You already know the answer to that question, he’s a paid actor who signed a release form.

Has this helped for understanding the difference between an image that can be used for commercial versus editorial? An editorial image can only be used for portraying a set of facts. If you photograph your neighbor cutting the grass, it’s a neighbor cutting the grass. Mundane scenes have virtually no use for editorial which is why you never see them. The more common editorial images you usually see have already been mentioned above. If the person(s) in your image sign a model release form, then they are agreeing their image can be used to promote a product, idea, or concept. Which is why people work as models, in return for their likeness to be used, they generally expect some sort of compensation. Hiring models and paying them, that would be the subject of another blog.

dreamstime_s_21427606
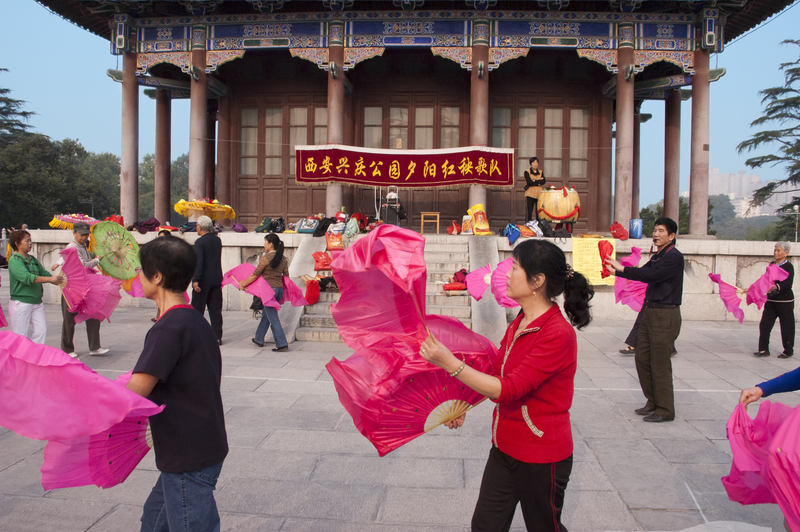
Editorial Photo: Chinese People Exercise, Xingqing Park Xian China

The subject of editorial versus commercial use of images can actually become more complicated depending on certain situations. Laws can vary from one country or another. There have also been instances where a model signed a release form and still took the phootgrapher to court because of how an image was used. These are advanced topics but suffice to say, if you now understand the fundamnetal difference between editorial and commercial images, you’ll be off to a good start.

HDR Images and Microstock

Images and article by Pratik Panda

HDR imagery (HDR stands for High Dynamic Range) is a controversial topic when it comes to photography in general because the images produced can be rendered in a variety of different ways, including extremely high contrast images or images with very high saturation that might look like paintings. If you are a stock photographer, you do not really enjoy that freedom of playing with the contrast and saturation of your HDR toned images. More often than not, you will face rejections with reasons being over-processed image or noise/artifacts or chromatic aberration.

Here are some tips you may like to take care of while producing HDR images for your commercial stock photography portfolio:

  1. Bracket properly: Whenever possible, use Aperture Priority mode and set bracketing to +-2 of the normal 0 EV. The 0 EV may not be what the camera meters for you. If the scene is overly bright toned, you might want to set the base EV at +1 2/3. Note that for a good HDR, 0 EV is that level of exposure where none of the highlights is blown and none of the shadows are absolute black either.
  2. How many bracketed shots to make? This is not something to think about much. If you are shooting in RAW, all you need is 3 bracketed shots that are wide enough such that one shot has clipped shadows and one has clipped highlights. Usually +-2 EV is enough for this.But if you are shooting in JPEG, it is usually better to take 5 shots with maximum of 1 EV width between the exposures. Otherwise you may get banding in the gradients like blue skies or domes in modern architecture.
  3. Bracketing technique: This is relevant. You MUST bracket your shots such that only the shutter speeds are different in the shots and aperture does not change. If aperture changes, depth of field will change and you will get soft HDR images.
  4. Use a tripod, ALWAYS! Well that is an exaggeration. You can do HDR handheld (and sometimes you have no option when a tripod is not allowed). But then you need to be good with post processing and you should know how to align images in Photoshop before making an HDR. If you want fast HDR image production with minimum hassle and good sharpness, tripod is a requisite.
  5. Preprocessing the HDR: Do basic chromatic aberration problem removal and noise reduction (if needed) on all images before combining them to HDR. They worsen many times over in the final output if you don’t. This matters more for JPEGs.
  6. Tone mapping the HDR: Tone mapping the HDR is the hardest part when you are preparing an HDR image for submission to any microstock website. There is always a tendency to go past the acceptable limits of contrast and saturation. You can avoid this by comparing the tone mapped image with the neutral exposure. If it looks over processed, you will know.
  7. Before submitting: Before saving the image for submitting, make sure you have checked for the following problems:
    • Ghosting (moving objects appearing twice or other such anomalies)
    • Noise in darker areas and areas that have been processed relatively more.
  8. Inspect HDR images closely before submitting. Too high contrast makes patches or gives noticeable noise problems which will give you rejections.
  9. While taking HDR of sky/clouds, make sure you’re not exposing the sensor to direct sunrays for prolonged periods of time. By the time you set the camera, you may get damage done to the equipment.

WHEN to go for HDR images?

HDR photography is all about capturing different exposures of the same scene, right? But unfortunately we seem to forget it all the time. If you can notice differences in details of specific areas in different exposures, then HDR is the way to go for that scene. If one exposure exposes the whole scene properly, an HDR will not be of much use at all.
Whenever you shoot HDR images, make sure that the normal exposure (usually 0EV) has no/very little underexposed or over exposed areas. If most of it is under exposed, just set normal exposure at +1/3 or +2/3 EV, etc and then apply +-2 bracketing. No use shooting in HDR at all if you get the sky overexposed in all the shots! It causes a lot of disappointment later.

APPLICATIONS (best uses):

  • Make boring scenes vivid and detailed, especially dramatic skies and landscapes.
  • Long exposure shots like waterfalls or sea beaches with rocks.
  • Product photography when you have no studio setup at home.